
How to Unblur a Photo: What Can Be Fixed and How
Whether you can unblur a photo depends on why it is blurry. A picture that is small, compressed or slightly soft can be made much clearer, often in a few seconds, with free tools. A picture that is badly out of focus or smeared by camera shake has lost its fine detail, and no app, AI or not, can genuinely bring it back. This guide shows you how to tell which kind you have, and what to do about each.
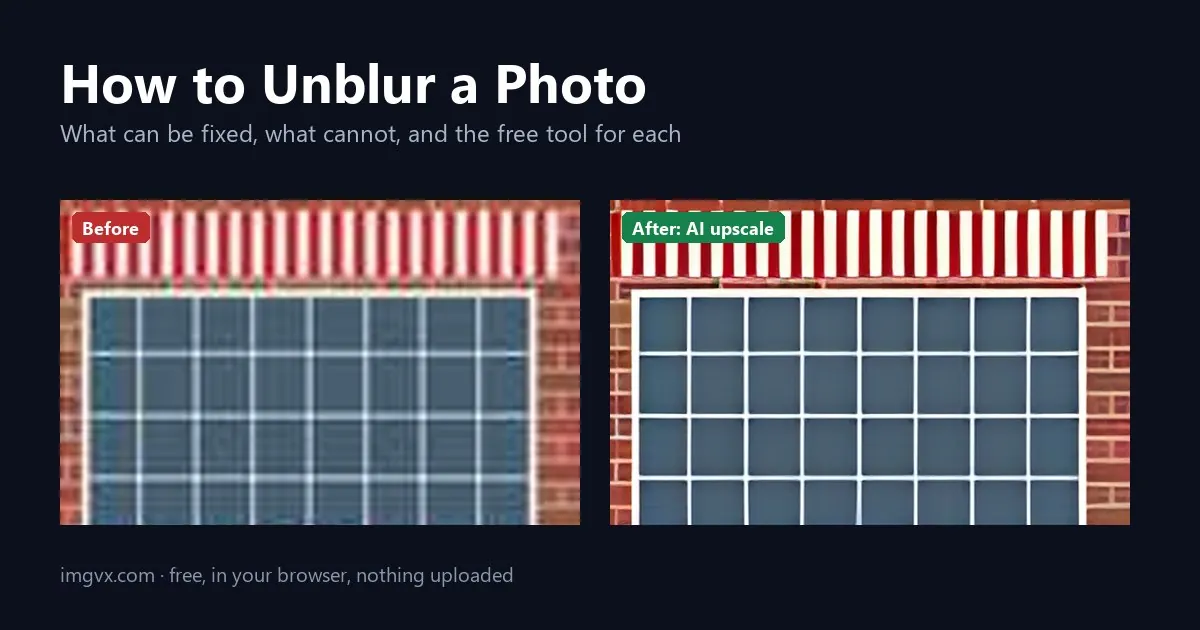
Unblurring a photo: the short answer
- Small or compressed (a thumbnail, a photo sent by a messaging app): use the Image Upscaler or the AI Photo Enhancer. Big shapes come back crisp; tiny text and faces can come out wrong.
- Slightly soft: use the AI Photo Enhancer, or the Image Sharpener for manual control.
- Grainy from low light: run the Noise Reducer first, then sharpen lightly.
- Badly out of focus, or camera shake: it cannot truly be fixed. Use a smaller version, crop, or retake the photo.
Why "unblur" is only sometimes possible
A sharp edge in a photo is a sudden change from one colour to another between neighbouring pixels. Blur spreads that change over many pixels. What decides whether it can be undone is where the detail went.
When a photo is simply small, or has been squeezed by heavy JPEG compression, the scene was captured sharply but stored with too few pixels or too little information. The broad shapes are still there, and a tool that knows what real edges and textures look like can make a convincing, much clearer version. That is what an AI upscaler does: it was trained on millions of pairs of small and large images, so it predicts what the larger version most likely looked like.
When a photo is out of focus, or the camera moved during the exposure, every point of light in the scene was smeared over a disc or a streak before it reached the sensor. Neighbouring details are blended together in the recorded pixels, and the information that told them apart is gone. Sharpening can make the edges of the blur crisper, and an AI can clean up noise, but neither can reconstruct the detail that was never recorded. Anything that looks like it has is invention.
That is why the first step is not choosing an app. It is working out which kind of blur you have.
Which kind of blur do you have?
Open the photo and zoom in to 100% or more on an edge or some text. The look of the edges tells you the cause:
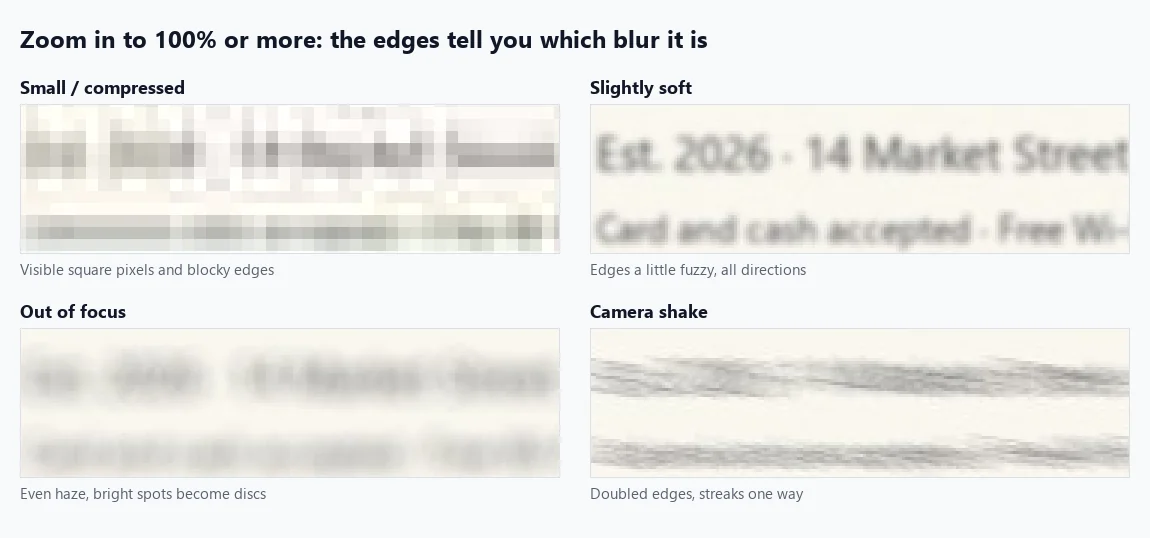
| What you see up close | Kind of blur | Can it be fixed? |
|---|---|---|
| Square pixels, blocky edges, smudgy halos around text | Too small, or heavily compressed | Mostly, with AI upscaling |
| Edges slightly fuzzy, equally in every direction | Slightly soft | Yes, with enhancing or sharpening |
| Speckled grain in dark and flat areas | Noise from low light | Largely, with noise reduction |
| An even haze; bright points turn into round discs | Out of focus | No, only slightly improved |
| Doubled edges or streaks all going one way | Camera shake or a moving subject | No, only slightly improved |
Two quick checks help. If part of the photo is sharp and another part is blurry, such as a sharp background behind a blurry face, the camera focused on the wrong thing: that is focus blur. If everything is blurred in the same direction, the camera moved: that is shake. And if the photo looks fine on your phone but fuzzy on a computer, it is probably just small.
What we tested, and what worked
To show this honestly rather than with a hand-picked success, we drew a test image full of the things blur destroys first: lettering in four sizes, brickwork, thin stripes and the spokes of a wheel. We then made four blurry copies and ran each through the tool this guide recommends for it. The upscaler and enhancer runs used the same Real-ESRGAN model file the site's tools load in your browser, and the sharpening used the same unsharp-mask method as the Image Sharpener.
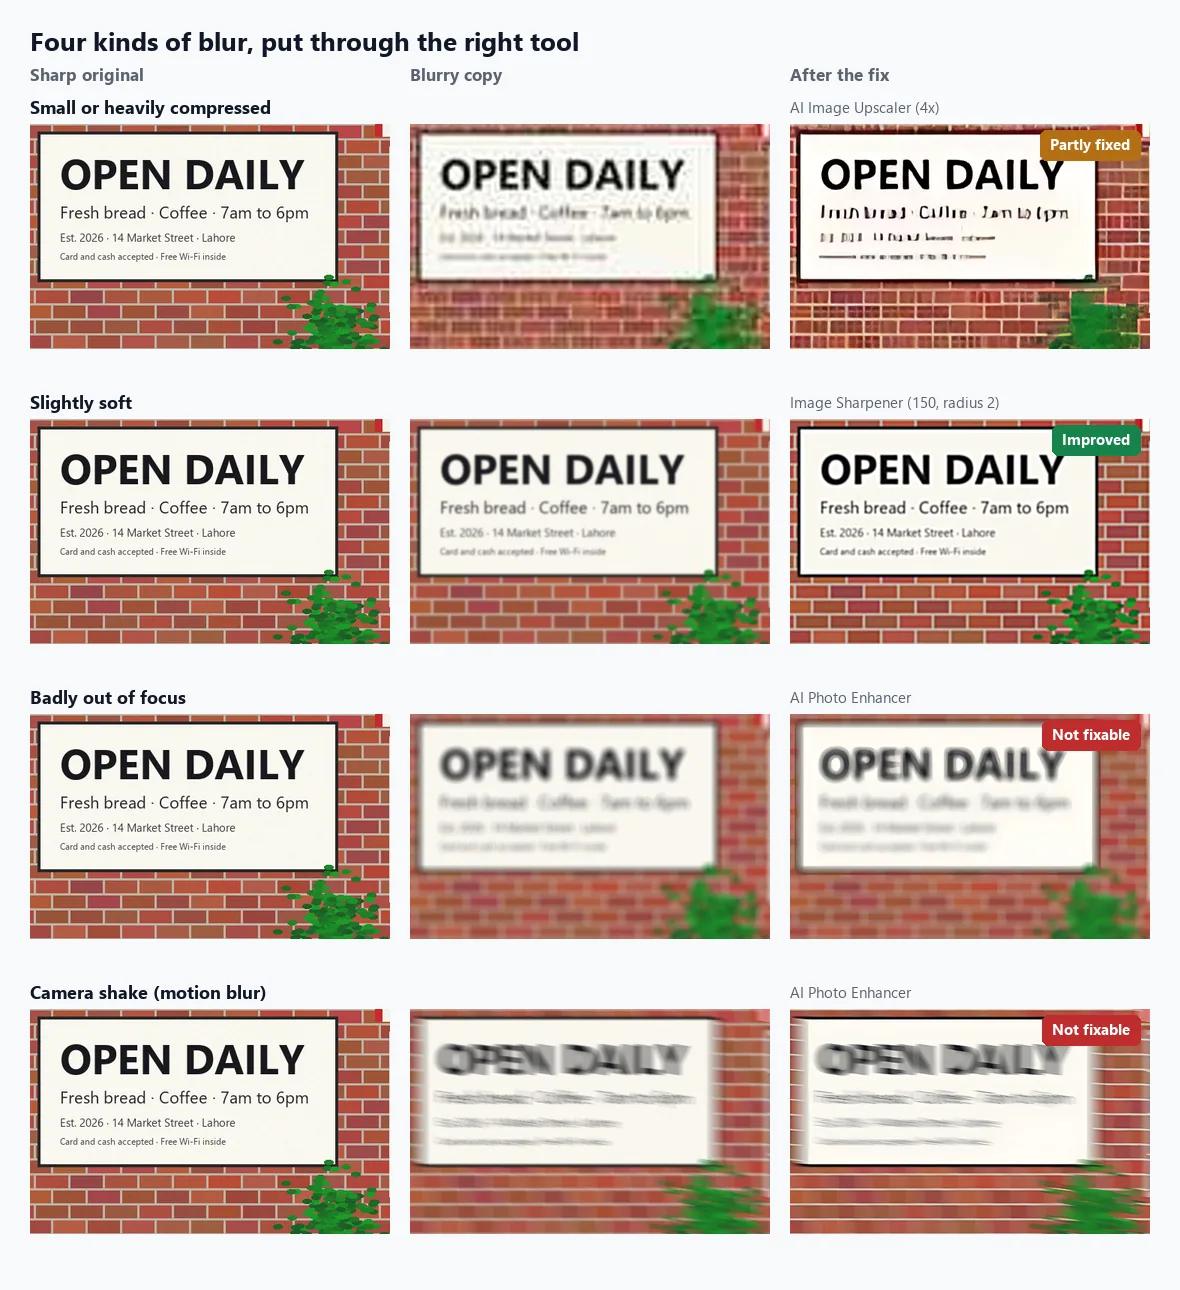
What the test showed:
- Small or compressed: partly fixed. The large "OPEN DAILY" lettering, the brick lines and the window bars came back crisp. The small print did not: the upscaler drew confident, clean letters that spell nothing. That is the clearest illustration of what AI upscaling is: a prediction, very good on shapes and textures, unreliable on detail smaller than a few pixels.
- Slightly soft: improved. Sharpening restored readable edges on every line of text. Measured pixel by pixel against the sharp original, the AI Photo Enhancer came closer still, so try it first and use the sharpener when you want to tune the result yourself.
- Out of focus: not fixable. The enhancer cleaned the noise but the haze stayed. Turning sharpening up to its maximum just added outlines around the haze.
- Camera shake: not fixable. The streaks remained. Heavy sharpening made it measurably worse by exaggerating the doubled edges.
Fix a small or compressed photo
This is the most common "blurry" photo: a picture saved from a website, a thumbnail, a screenshot of a photo, or an image that went through a messaging app that shrank it. It looks fine small and falls apart when you enlarge it.
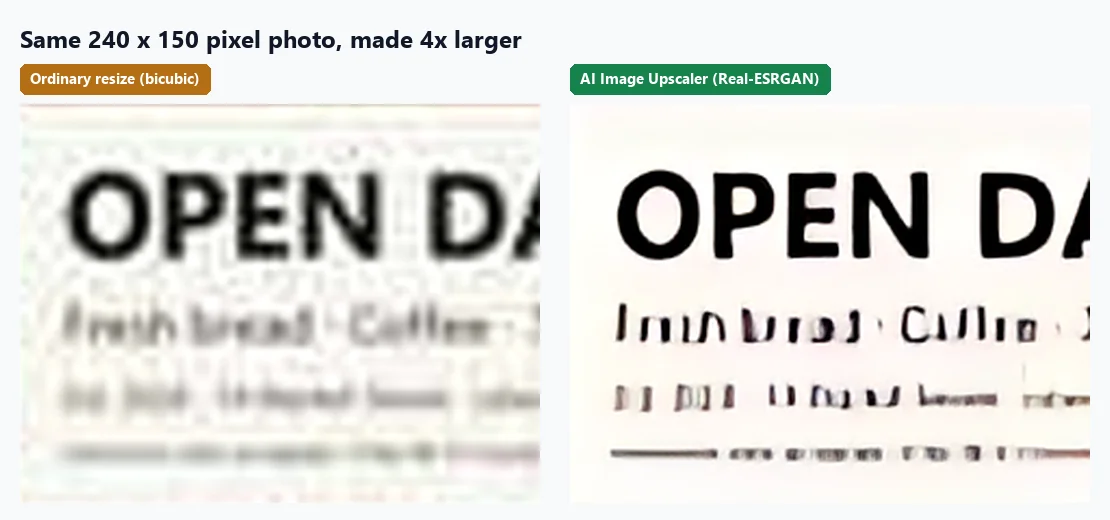
- Find the largest copy of the photo you can. The original from the phone that took it, or the "download original" option in a cloud album, will always beat any repair.
- Open the Image Upscaler and add the photo. Choose 2x for a modest improvement or 4x for a small image you need much bigger. The first run downloads the model, about 5 MB, once.
- Compare the result with the original at full size. Check faces, text, logos and anything you will rely on, because those are where the model guesses.
- If you only want it cleaner, not larger, use the AI Photo Enhancer with "Same size as the original" instead. It runs the same model and scales the result back down, which removes compression blocks and noise while keeping the dimensions.
If the image is for a print, work out the pixels the print needs first; the DPI and print size guide explains how, and when upscaling is worth it.
Fix a slightly soft photo
A slightly soft photo has everything in roughly the right place but lacks bite: a quick snap where focus was nearly right, an older phone camera, or a photo that has been resized a few times.
- Try the AI Photo Enhancer first, at "Same size as the original". It also corrects dull colour and light unless you choose "Leave as it is".
- If you prefer manual control, open the Image Sharpener. Start with Amount 100 to 150, Radius 1 or 2 and Threshold 3, which is close to what we used in the test.
- Raise Radius for larger, softer shapes and lower it for fine texture like hair and fabric. Raise Threshold if smooth areas such as skin or sky start to look grainy.
- Stop as soon as bright halos appear along edges. A little under-sharpened always looks more natural than over-sharpened.
Sharpen last. If you are also resizing, cropping or compressing, do those first, because each changes how sharp the final image looks. The guide to resizing without losing quality covers the order in more detail.
Fix a grainy low-light photo
Photos taken indoors or at night often look blurry when the real problem is noise: coloured speckles that hide fine detail. Phone cameras smooth this away automatically, which can leave a smeared, painted look.
- Run the Noise Reducer at Radius 1 with one pass. It uses a median filter, which removes speckles while keeping edges standing. Use the "Blend with original" slider to keep some texture if the result looks plastic.
- Then sharpen gently in the Image Sharpener, with a higher Threshold, around 8 to 15, so the remaining grain is not sharpened back up.
- Alternatively, the AI Photo Enhancer does both jobs in one pass and is usually the better choice for faces, where the median filter can look smudgy.
Out of focus or camera shake: what you can still do
If the zoom test showed an even haze or streaks, the honest answer is that the photo cannot be made genuinely sharp. Some desktop software offers deconvolution, which can partly reverse a small, straight shake when the exact blur path can be estimated, but on ordinary photos it adds ringing artefacts and rarely gives a clean result. Generative "AI unblur" apps take a different route: they redraw the image, inventing new detail. On a face that means a sharp face that may not look like the person, which is why ImgVX AI does not offer it.
What does help:
- Show it smaller. Blur that is obvious at full size is often invisible at phone-screen or thumbnail size. Shrink it with the Image Resizer to the size you actually need.
- Crop to what is sharpest. Often one part of the frame is acceptable. The Image Cropper keeps that and drops the rest.
- Make the softness look intentional. Black and white, a vintage look or film grain can make a soft photo read as a style choice. Try the Aesthetic Filters or Grain & Vignette.
- Check for a better frame. Phones often save several shots: a Live Photo on an iPhone or a burst on Android may hold a sharper moment.
- Retake it if you can. Nothing a tool does beats a second, steady shot.
Unblur a photo on iPhone or Android
Every tool in this guide runs in the browser, so on a phone you open it in Safari or Chrome, tap to choose a photo from your library, and save the result back to Photos or Files. Nothing is installed and the photo is not uploaded: the AI model runs on the phone itself. The first run of an AI tool downloads its model, which is best done on Wi-Fi, and newer phones process noticeably faster than older ones.
Your phone's own editor can help a little too. On an iPhone, the Photos app's edit screen has Sharpness, Definition and Noise Reduction sliders under Adjust, which work for slightly soft shots. Google Photos on recent Pixel phones has an Unblur tool for the same purpose. Neither can fix strong focus blur or shake, for the reasons above.
Unblurring text and screenshots
Text is the hardest test for any unblur method, because a misread letter changes the meaning. For a small or compressed screenshot, upscale it with the Image Upscaler and read every word against the original: as the test showed, large text comes back well while text a few pixels high can be replaced with plausible nonsense. If you need the words as text, run the clearest version through Image to Text and proofread names and numbers.
Do not try to reverse text that someone blurred or pixelated on purpose, such as a hidden name or account number. It is not yours to reveal, and the guesses an AI makes about it are not evidence of anything. If you are the one hiding information, use solid blocks rather than blur; the guide to hiding information in screenshots explains why.
How to stop taking blurry photos
- Wipe the lens. A fingerprint on a phone lens causes a hazy glow that looks like focus blur, and it is the most common cause of all.
- Tap to focus on the subject before you shoot, especially when something in the foreground could grab the focus.
- Add light. In dim light the camera uses a slower shutter, and any movement shows. Move towards a window or turn on a lamp.
- Hold still after pressing. Brace your elbows against your body or lean on something, and keep still for a moment after the shutter sound.
- Step closer instead of zooming. Digital zoom enlarges a crop of the sensor and softens the picture. On phones with several cameras, the 2x or 3x lens is fine; beyond that, move your feet.
- Send originals. Messaging apps shrink photos. Share a cloud link or use the app's "send as file" or high-quality option when the picture matters.
Frequently asked questions
Can you really unblur a photo?
Sometimes. A photo that is blurry because it is small, compressed or slightly soft can be made much clearer. A photo that is badly out of focus or smeared by camera shake has lost its fine detail, and no tool can bring that back; it can only be made to look a little cleaner.
What is the best free app to unblur a photo?
For most blurry phone pictures, the AI Photo Enhancer is the quickest start: it runs in the browser on iPhone, Android or a computer, with no app to install. Use the Image Upscaler when the photo is also small, and the Image Sharpener when you want manual control.
Can AI fix a blurry face?
It can clean up a face that is small or compressed, but it cannot recover a face that is out of focus. Apps that appear to do it are redrawing the face with a generative model, so the sharp result can look like a different person. ImgVX AI does not redraw faces.
How do I unblur text in a picture?
If the text is small or compressed, upscale the image with the Image Upscaler and check every word: large lettering comes back well, but text only a few pixels tall can turn into letters that were never there. To copy the text out, run the result through Image to Text. Text that someone deliberately blurred or pixelated to hide it should stay hidden.
Why does my phone take blurry pictures?
Usually a smudged lens, low light or movement. In dim light the camera uses a slower shutter, so any shake while you tap the button shows as blur. Wipe the lens, find more light, tap to focus on the subject, and hold still for a moment after pressing. Digital zoom also makes photos softer. Browse: all free image tools.
Does sharpening make a photo higher resolution?
No. Sharpening makes existing edges look crisper but keeps the same number of pixels. To make a photo larger with clean detail, use the Image Upscaler, then sharpen lightly afterwards if needed.
Try it on your own photo
Free, in your browser, with no sign-up. Your photo stays on your device.