
How to Change Image Opacity Online (Free, No Sign-Up)
To change the opacity of an image, open the free Transparency & Opacity tool, drop in the image, move the Opacity slider (0 is invisible, 100 is solid) and download the result as PNG or WebP. Do not save it as JPG: a JPG cannot be see-through, so the fade is baked onto white. No sign-up, nothing uploaded. Below: what each setting stores in the file, what happens in each format, and values to start from.
The short answer
- Tool: Transparency & Opacity. Opacity 0 to 100 (it starts at 60), saved as PNG by default.
- Format: PNG or WebP keeps the image see-through. JPG does not.
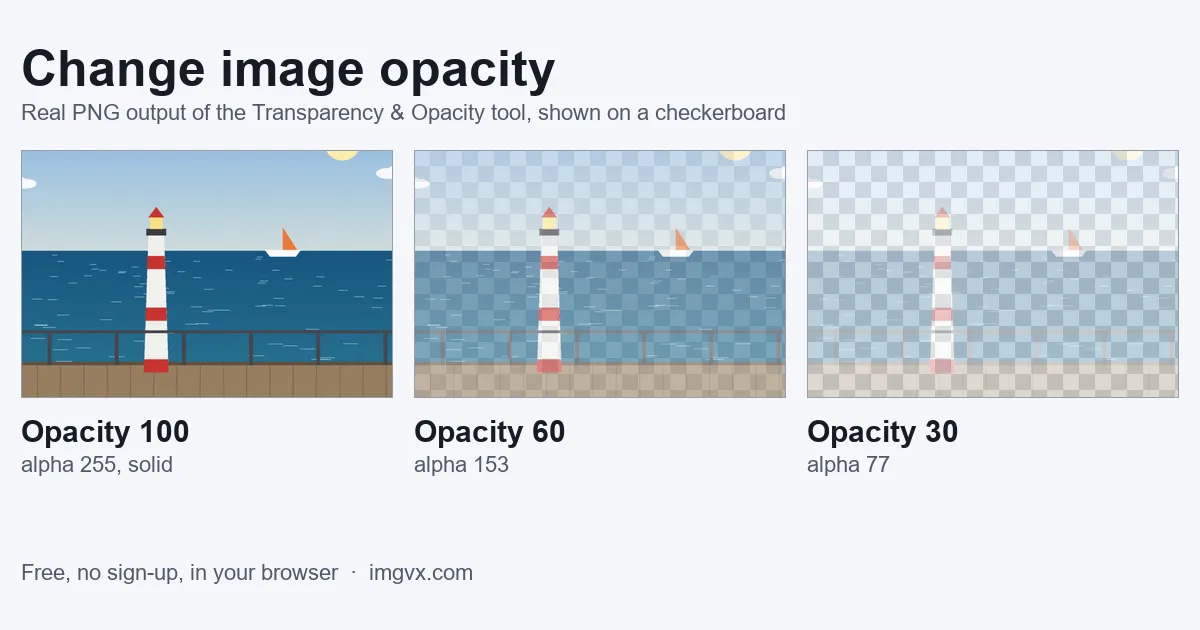
- Measured: Opacity 60 stores an alpha value of 153 out of 255 in every pixel. The PNG was 21 % larger than the solid one; the WebP was about the same size.
- Cost: free, full resolution, no watermark. The image stays in your browser.
How to change the opacity of an image in three steps
- Open Transparency & Opacity and drop in the image. JPG, PNG and WebP all work. The image is processed by your browser and stays on your device.
- Move Opacity. 100 leaves the image solid, 0 makes it invisible. The slider starts at 60. Leave “Flatten onto a solid colour” unticked if you want a see-through file.
- Keep Save as on PNG, or choose WebP, and download. The file has the same width and height as the original.
The result is a see-through picture, ready to place over something else: a photo, a slide, a web page, a video. This tool makes the file; it does not put it on top of another picture.
What the Opacity number means
A PNG or WebP stores a fourth value for every pixel next to red, green and blue. It is called alpha and runs from 0 (clear) to 255 (solid). The Opacity setting is a percentage of 255. We ran the tool on a solid test photo and read the alpha value from each downloaded PNG:
| Opacity | Alpha stored (0–255) | Same as transparency | Same as CSS |
|---|---|---|---|
| 100 | 255 | 0 % | opacity: 1 |
| 90 | 230 | 10 % | opacity: 0.9 |
| 75 | 191 | 25 % | opacity: 0.75 |
| 60 (default) | 153 | 40 % | opacity: 0.6 |
| 50 | 128 | 50 % | opacity: 0.5 |
| 40 | 102 | 60 % | opacity: 0.4 |
| 30 | 77 | 70 % | opacity: 0.3 |
| 25 | 64 | 75 % | opacity: 0.25 |
| 10 | 26 | 90 % | opacity: 0.1 |
| 0 | 0 | 100 % | opacity: 0 |
Opacity and transparency are the same scale read from opposite ends. If an app asks for transparency, as PowerPoint does, subtract the opacity from 100. At Opacity 0 the download is an empty, fully clear image of the same size; on the test photo it was a 31 KB PNG.
PNG, WebP or JPG: which keeps it
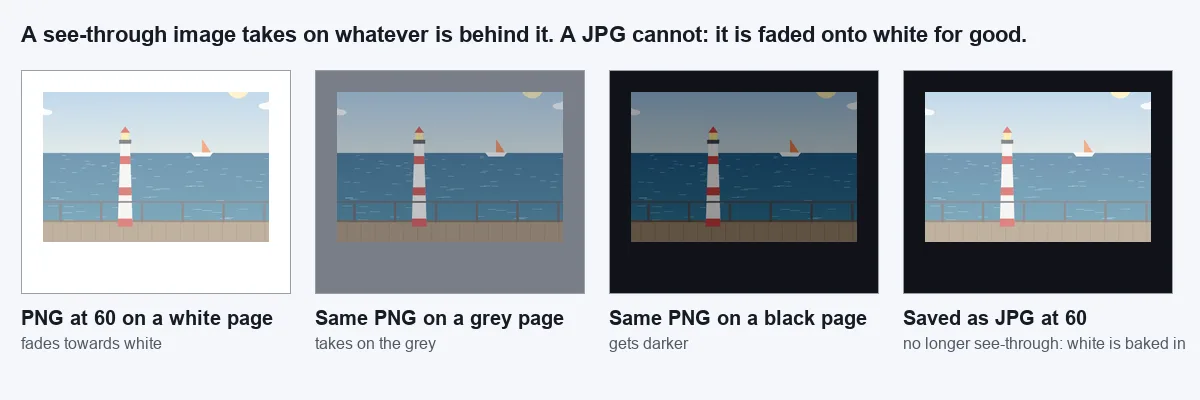
The format decides whether the image is still see-through after you save it. The same 1440 × 960 test photo, at Opacity 60:
| Save as | See-through? | File at Opacity 60 | Same photo, solid (Opacity 100) |
|---|---|---|---|
| PNG | Yes, alpha 153 | 2.31 MB | 1.91 MB |
| WebP | Yes, alpha 153 | 186 KB | 183 KB |
| JPG | No. Faded onto white | 151 KB | 228 KB |
Three things follow from the numbers.
- A JPG is never see-through. JPG has no alpha value, so the tool puts white behind the faded photo. It looks right on a white page and wrong everywhere else. If your faded image shows a pale box on a coloured slide, this is why.
- Lower opacity does not mean a smaller file. The see-through PNG was 21 % larger than the solid one. If size matters, as it does on a web page, choose WebP: it was a twelfth of the PNG here.
- Some places drop transparency. Certain apps and upload forms show clear areas as white or black. The transparent images guide lists which keep it, and the image formats guide compares PNG, WebP and JPG in general.
Values to start from
These are starting points, not rules. The right value depends on what sits behind the image, so check it in place and adjust.
| Job | Opacity to try | Why |
|---|---|---|
| Logo over a photo as a watermark | 20–40 | Visible without competing with the photo |
| Picture behind text on a slide or poster | 15–30 | Text must stay easy to read on top of it |
| Faint crest or stamp behind a letter or certificate | 10–20 | It should not interfere with the print |
| Overlay to compare or trace against another picture | 50 | Both pictures show equally |
| Slight softening of a sticker or badge | 80–90 | Still reads as solid |
If the picture is only going into one slide deck or design, the app’s own transparency slider is quicker. A see-through file is worth making when you will reuse it, when the place you are putting it has no such slider, or when it must look the same everywhere. For a text watermark across a photo, the Watermark Tool does the whole job in one step; how to add a watermark to a photo covers the settings.
Logos that already have a transparent background
A logo PNG usually has a clear background already. Lowering the opacity keeps it clear and fades only the visible part. On an 800 × 800 test logo in which 43 % of the pixels were clear, Opacity 40 took the solid body from alpha 255 to 102 and left the background at 0. Soft edges fade in proportion, so the outline stays smooth.
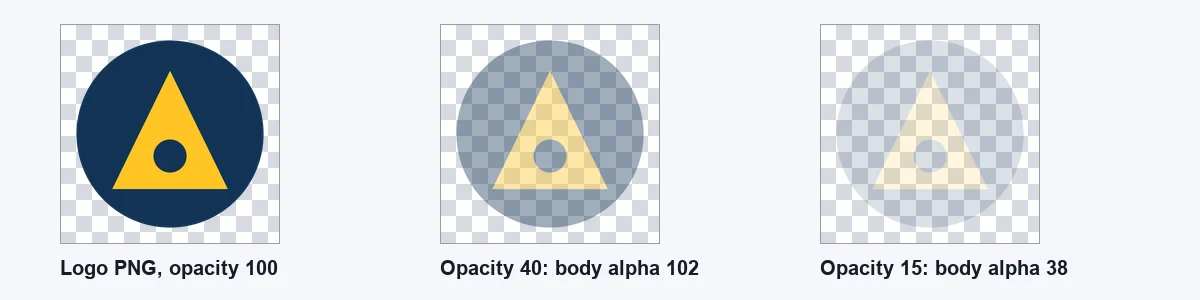
If your logo still has a white box around it, remove that first with Make Background Transparent, or use the Background Remover for a photo. How to make a background transparent explains which one suits which image. Then lower the opacity.
Fading onto a colour instead
Sometimes you do not want a see-through file. You want a paler picture that works anywhere, including as a JPG. Tick “Flatten onto a solid colour” and pick the Background colour. The tool blends the image with that colour and saves a solid picture.
- White gives a washed-out version for a light page. At Opacity 60, pure black in the image became mid grey (101 out of 255) and pure red became a pink (255, 101, 101). At Opacity 30, black became a light grey (177).
- Black gives a dimmed version for a dark page or behind white text.
- A brand colour tints the picture towards that colour.
Flatten with Opacity at 100 does the opposite job: it fills the clear areas of a transparent PNG with the colour and leaves the rest untouched. That is the fix for a logo that shows a black background after an upload.
What an opacity setting cannot do
- Fade only one area. The setting applies evenly to the whole image. It cannot make just the background clear or fade one edge into nothing.
- Bring a faded JPG back. Once a picture has been faded onto white and saved, the original colours are gone. Keep the original file and start from it.
- Raise the opacity of a faint image. The slider multiplies what is there; 100 leaves the image as it is.
- Place the image on another picture. Use a slide, design or video app for that, or Combine Images to join pictures side by side.
When the see-through file is ready, change its size with the Image Resizer, which hands a PNG back as a PNG. The free AI image editing guide lists every other free tool on the site.
Questions
How do I change the opacity of an image for free?
Open the free Transparency & Opacity tool, drop in the image, move Opacity (0 to 100) and download it as PNG or WebP. There is no sign-up and no watermark, and the image is processed in your browser, never uploaded.
Why is my image not see-through after I saved it?
It was probably saved as a JPG. JPG has no transparency, so the faded image is stored on a white background and stays pale on any page. Save as PNG or WebP instead. Some apps and upload forms also drop transparency when they import a file.
What is the difference between opacity and transparency?
They are the same scale read from opposite ends. Opacity 100 is solid and opacity 0 is invisible; transparency 100 % is invisible. Opacity 60 equals 40 % transparency, and equals opacity: 0.6 in CSS.
What opacity should a logo watermark be?
Start between 20 and 40 and judge it on the photo it will sit on. A dark logo on a pale photo shows at 20; a pale logo on a busy photo may need 40 or more. For a text watermark, the Watermark Tool puts it on the photo for you.
Does lowering the opacity make the file smaller?
No. On our 1440 × 960 test photo the PNG grew from 1.91 MB at opacity 100 to 2.31 MB at opacity 60, about 21 % larger, and the WebP stayed almost the same (183 KB and 186 KB). Use WebP when the see-through file has to be small.
Can I make only part of an image transparent?
Not with an opacity setting, which fades the whole image evenly. To clear only the background, use the Background Remover for photos or Make Background Transparent for a logo on a flat colour.